HelloWorld with Java, iOS and RoboVM
June 2, 2014
java
iOS
robovm
eclipse
xcode
Ever since native iOS applications have been developed with Objective C, there has been a surprising emergence of alternatives to using Objective C as the language to develop these applications. For example, just to name a few:
- PhoneGap using HTML/JS
- RubyMotion using Ruby
- ionic using AngularJS
The latest one that I have come across is RoboVM, that allows for iOS applications to be written and deployed using the Java language. This post will go through the steps of getting a very simple application up and running with RoboVM and Java.
Here are the pre-requisites:
- OSX 10.9.3 (Mavericks)
- JDK 1.7
- Eclipse Kepler 4.3
- XCode 5.1.1
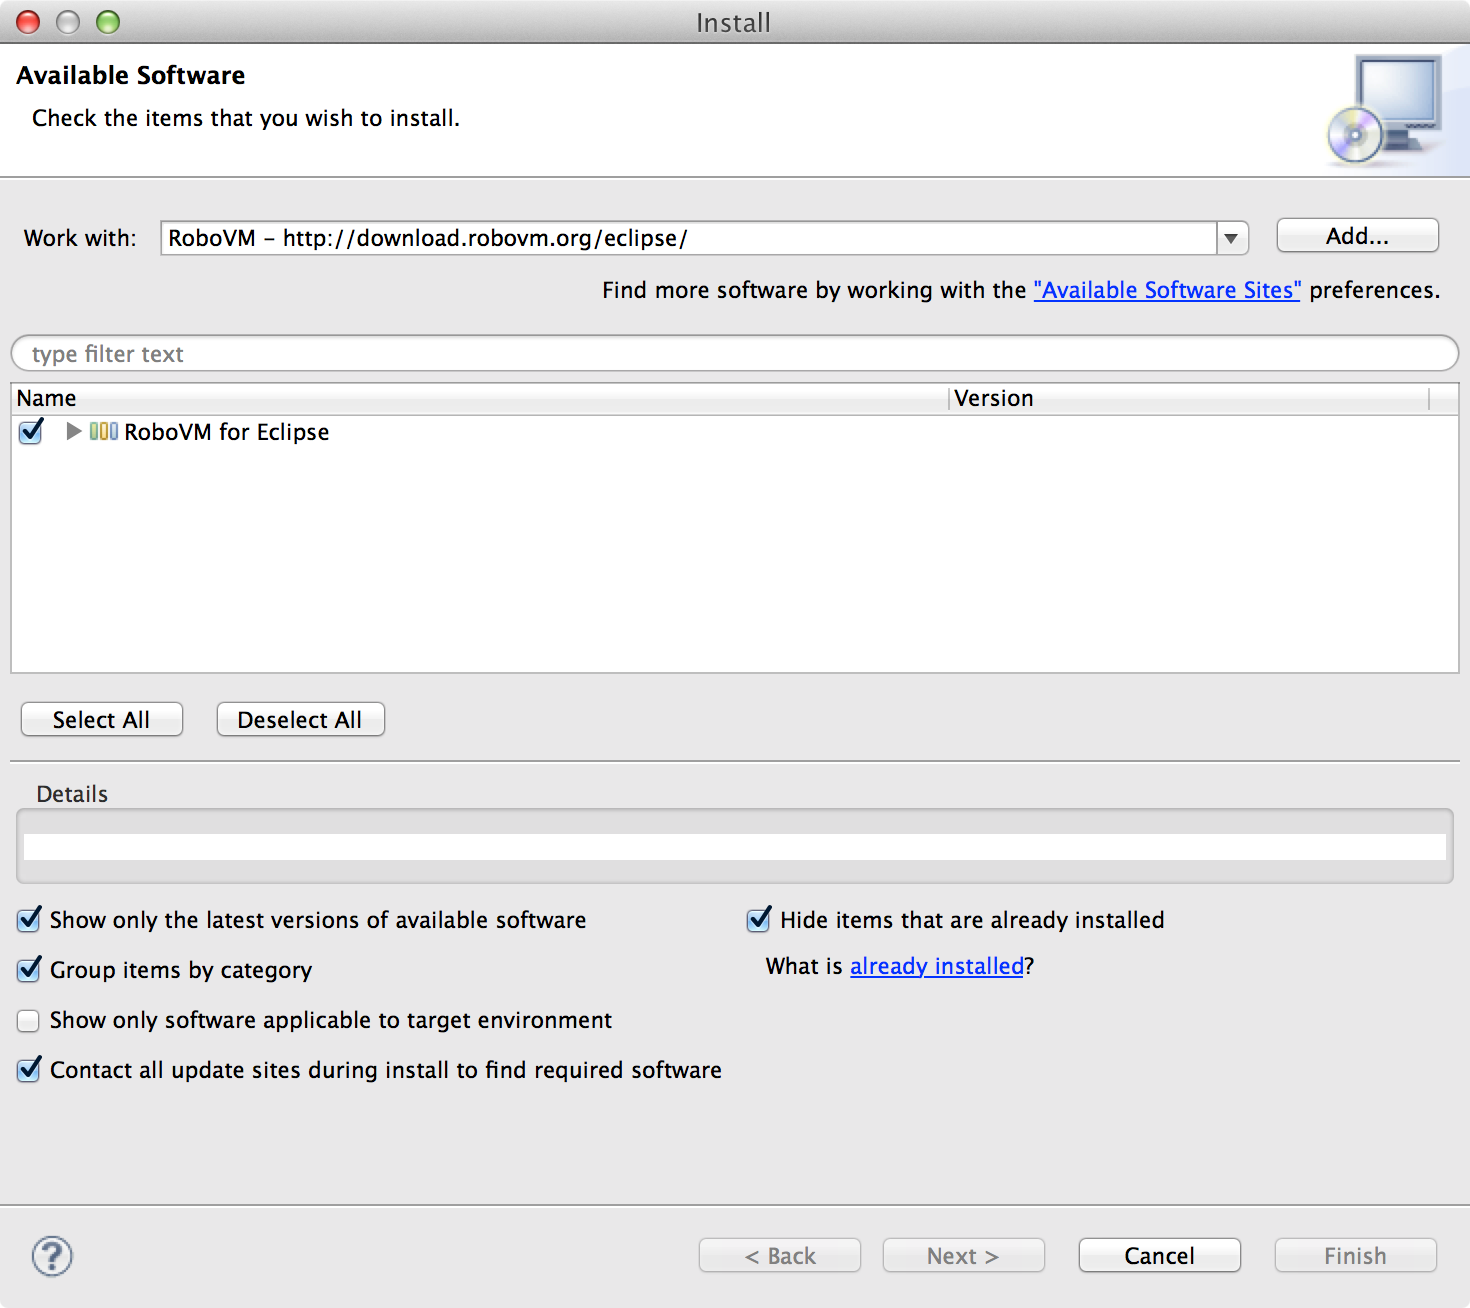
Firstly, within Eclipse, install the RoboVM plugin, under Help, Install New Software, http://download.robovm.org/eclipse/. This will need to restart the IDE.
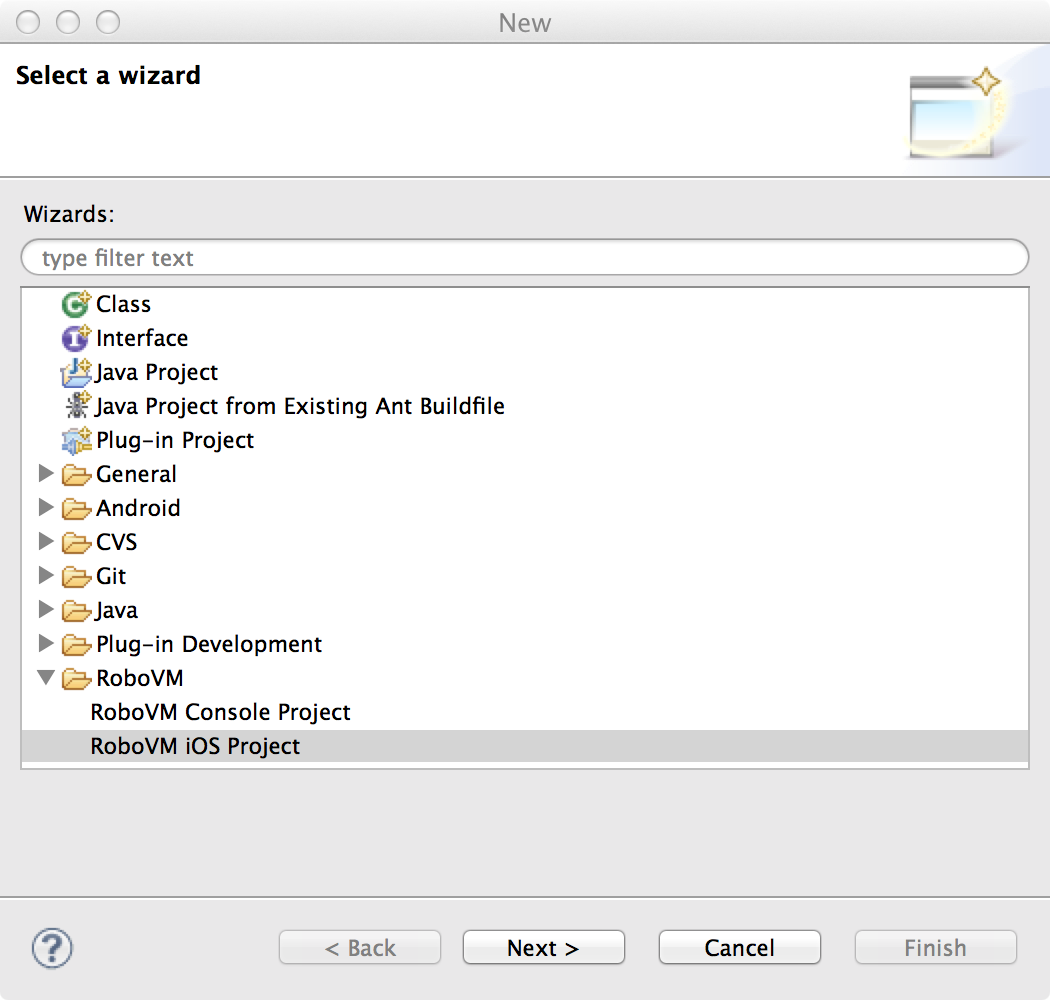
With the plugin installed, you can create a new project. Select the ‘RoboVM iOS Project’ option.
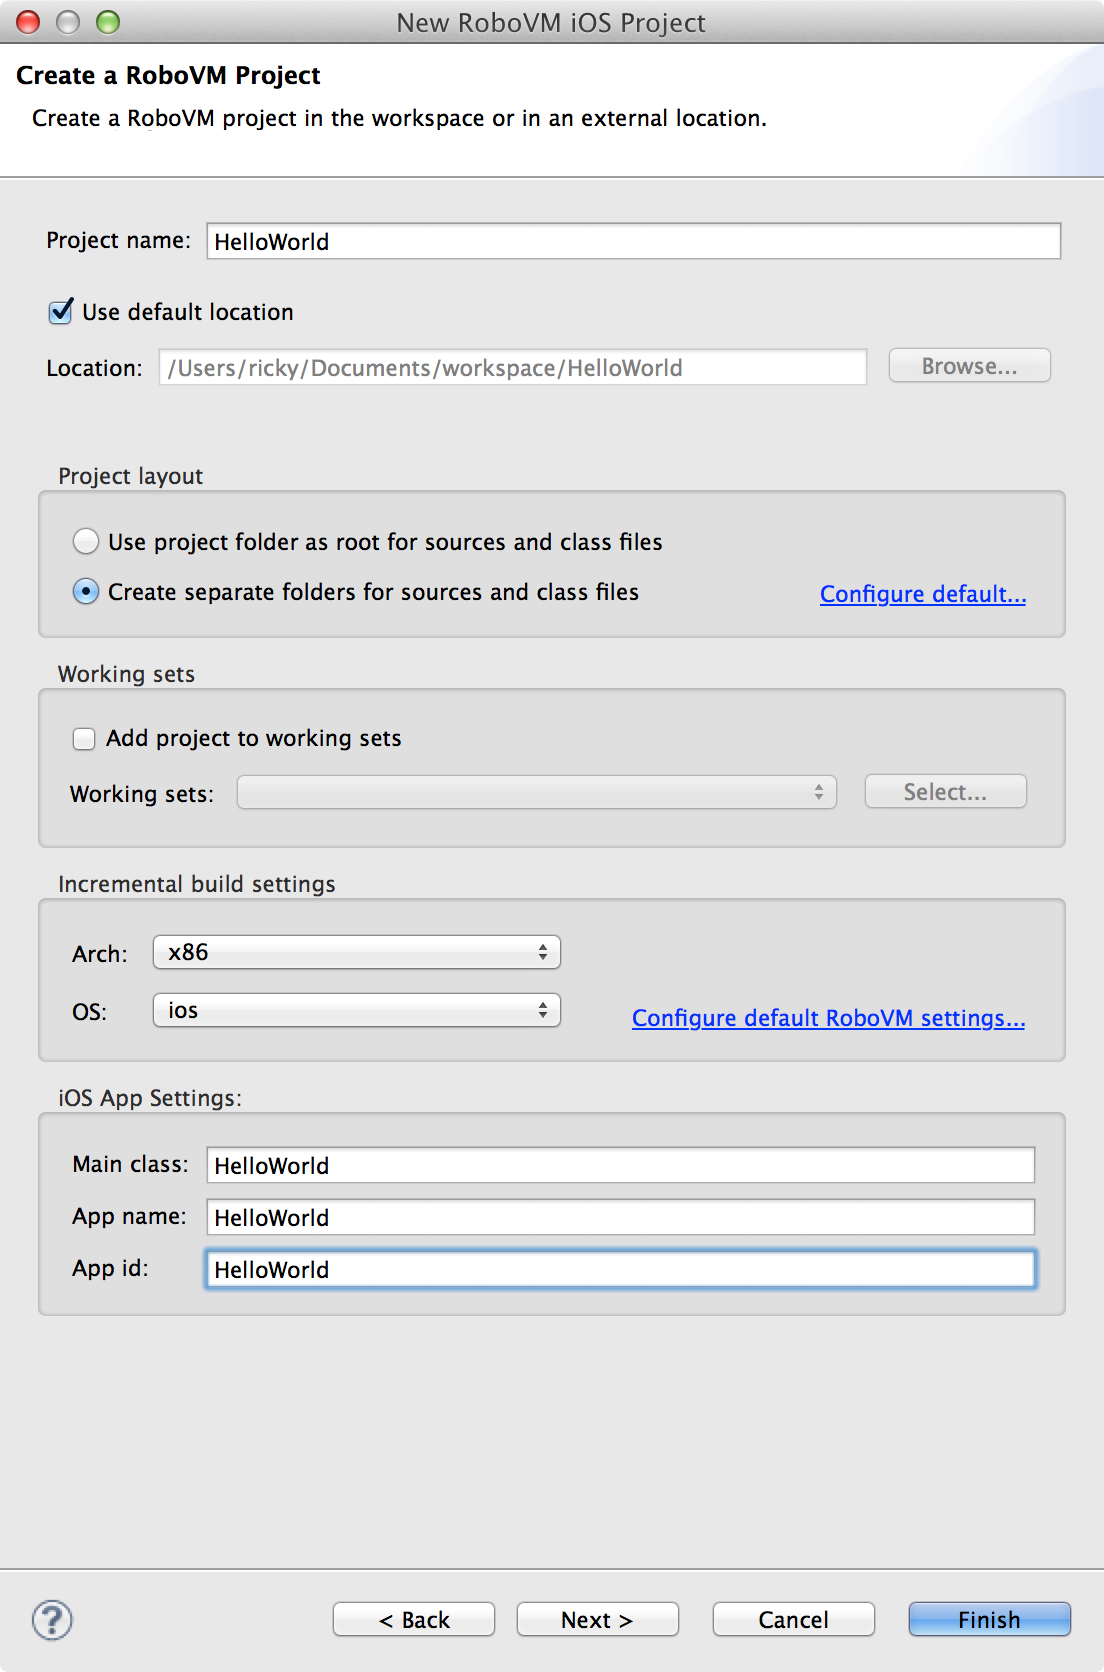
Just use ‘HelloWorld’ as the project name, Main class, App name and App id. It should look like the screenshot below.
For some reason, when I use the wizard, the Main Class does not get created, so this needs to be done manually. So create a class called HelloWorld.
Put the following contents in the HelloWorld class.
import org.robovm.apple.foundation.NSAutoreleasePool;
import org.robovm.apple.foundation.NSDictionary;
import org.robovm.apple.foundation.NSString;
import org.robovm.apple.uikit.UIApplication;
import org.robovm.apple.uikit.UIApplicationDelegateAdapter;

public class HelloWorld extends UIApplicationDelegateAdapter {

	@Override
	public boolean didFinishLaunching(UIApplication application,
			NSDictionary<NSString, ?> launchOptions) {
		return true;
	}

	public static void main(String[] args) {
		NSAutoreleasePool pool = new NSAutoreleasePool();
		UIApplication.main(args, null, HelloWorld.class);
		pool.close();
	}

}
Here we are extending the UIApplicationDelegateAdapter which is RoboVM version of the UIApplicationDelegate. We have a main method in the class which launches the application.
What we will do now is override the didFinishLaunching method to create an UIWindow and an UIlabel. To achieve this, add the following details to the method.
	@Override
	public boolean didFinishLaunching(UIApplication application,
			NSDictionary<NSString, ?> launchOptions) {
		UIWindow window = new UIWindow(UIScreen.getMainScreen().getBounds());
		UILabel label = new UILabel(new CGRect(50, 50, 100, 50));
		label.setText("Hello World");
		window.addSubview(label);
		window.setBackgroundColor(UIColor.colorGreen());
		window.makeKeyAndVisible();
		return true;
	}
Most of the code above should be pretty self explanatory. The arguments into the construction of the CGRect class are the x and y co-ordinate followed by the label’s width and height.
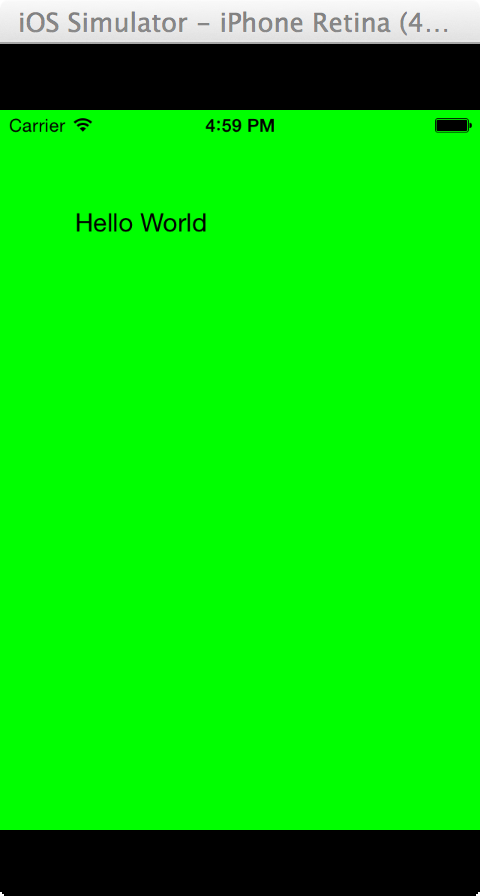
If you right click the project and select Run as/iOS Simulator App (iPhone). You should be presented with an iOS simulator with a green screen with the text “Hello World”. Something like the screenshot below.
If you have reached this point, it means your environment has been setup correctly and you should be able to start developing iOS applications with Java.
Here are some references for more information. I hope this post has been useful in showing you the first steps to iOS development using Java.